This Is What I Know About Gardening

Gardening tips for anyone, no matter what thumb color!

Thursday, September 17, 2009


Wow – summer might just be over. I have been so busy gardening, harvesting and preserving that I haven’t had a chance to blog. The jars are stowed in the pantry, the freezer is full and it has begun to rain. I can now spend time with my computer. I hope you all had a great gardening season! In the next little while I am going to be adding some of my favorite recipes for a fall harvest. I will keep you posted! Meanwhile...check out my garden pictures on the sidebar!


Thursday, April 9, 2009

POTATOES

Today I planted potatoes in between the raindrops, which got me started thinking about potatoes and what I know about them.

Potatoes were the only thing I planted in my very first garden when I was probably ten or so. Mom had heard about a new method which we tried. We had an old wooden boat in the back yard that made a perfect south facing backdrop for my new garden. Beside it we put a layer of hay on top of the grass, then a little dirt, some old potatoes from the grocery store that had sprouted in the potato drawer and more dirt to cover them. I vividly remember planting and watching, I don’t remember if I got any potatoes, but I am sure I did. I planted a few potatoes there every year slowly adding other things until eventually it was just a flower garden. My mom is still using parts of that old garden and I still enjoy growing potatoes.

Potatoes are great to grow because they are easy, don’t take much care and if conditions are right can really produce. But there are some things to consider before you get started with your potato adventure.

The place to plant: Potatoes are the most productive if they are in the sun and in rich soil, although they will grow almost anywhere. They need some space 8-12 inches between each plant and 8 – 10” total depth of soil. Adding compost under and around will enhance any potato garden. Potatoes are considered a cool weather crop, so plant early and in an area where you can plant something else when they are done.

Type of potato: For everyday eating the standard Idaho Russet variety of potato that you buy at the grocery are not expensive and they taste fine. So I just buy them…they are ready to eat and it is not a bad thing to contribute to Idaho’s economy or where ever they are grown. I save my precious garden space for special potatoes…

You might think that the varieties you buy at the grocery are the very best and you have the space so you decide to plant that kind. Be aware that generally potatoes found in the produce section have been treated with some kind of sprout inhibitor (a healthier reason to grow your own) which means they will probably grow eventually but it might take all season before they start. For gardening buy “seed” potatoes at the greenhouse store. “Seed” just means they are specially selected for growing in gardens and have no treatment, but they are potatoes. Nurseries will have russets and many more varieties.

Special potatoes: You should do some experimenting to find out which potatoes you think are special. I love the finger (small, long and skinny and look like fingers) and Golden potatoes (this attraction might be psychological since they look like they already have butter on them). Above I mention sprout inhibitor, but these two potatoes at Costco seem to be the exception (I discovered by accident) so that is where I get them. Another favorite is Yukon Gold that I get at the nursery.

Planting and care: There are many ways to grow potatoes; research on the internet will give more choices than are possible. When selecting your seed potatoes choose small ones, it is better to keep them whole when planting. Growing up we always cut chunks that included several “eyes” (sprouts) but this can invite problems that will cause the piece to rot and not grow. I just bury the whole thing in my raised bed with a little new compost under and dirt on top. The important thing is regular water and enough growing medium to keep the potatoes covered.

Potato problems: Scab is a common ailment found on the skin of home grown potatoes. It looks just like what the name implies and commercially they probably have a spray to prevent it. It doesn’t look all that great but won’t hurt you and can easily be peeled away. Scab is more common when potatoes are planted in the same place year after year. Rotating all garden crops at least three years is always good. I did read that keeping the soil on the acidic side is important so don’t add lime to your potato garden. Also buy seed that is scab resistant.

If a potato grows above the surface of the dirt it turns green and the green part tastes terrible. You can cut off the green and use the rest, but to prevent this, cover potatoes as you see them appear.

Harvesting: What I have always known is that when the plant turns brown and falls over, it is time to dig. It is so fun to discover the potato treasures after taking care of them for so long. Potatoes should be stored in a cool dark place and can last all winter. In the last few years I made an amazing discovery…potato plants don’t mind being stolen from. As soon as the plants are close to full grown, I gently dig and pick one or two potatoes from a plant which are connected with a long white root. The young tender potatoes don’t have much skin so a good scrub under the faucet makes them ready for boiling, baking or even better, grilling with a little olive oil and some fresh herbs.

In the Northwest, potatoes are all done and ready to harvest by early August. This gives a great opportunity to plant another cool weather crop you enjoy throughout the fall, such as leaf lettuce, spinach, broccoli, etc. I have also planted annual flowers in my potato bed since by then garden stores have them on sale.

Keeping your own seed potatoes: At the end of the season when I have gathered all the potatoes to eat and/or store there are always a bunch of small ones that are just a pain in the neck to deal with. I store them unwashed in the fridge’s veggie drawer to use as seed potatoes the next year.

Tuesday, March 17, 2009

Pesky Pests in the Garden

First of all may I just start by saying that I have had the privilege of experiencing many many types of pests in my yard from mighty moose to mighty slugs and as of yet have not solved the problem of eradicating them completely (and maybe I don’t want to for mother earth reasons) but along the way I have discovered a few tricks that may or may not help depending on the overall situation right at the moment the pests are being pesky.

Moose: In the Pacific Northwest Moose are not much of a problem, but in Fairbanks (where I came from years ago) moose are possibly the worst pest, because they can completely clear out every single green thing in your garden in one sitting. I see three options; grow enough for the moose and you, don’t grow anything the moose will eat (?) or electric fence.

Slugs: In Fairbanks I only ever saw one teeny tiny black slug!?! But that is not the case here in Western Washington, or in Juneau where I grew up. I remember one summer when I was 10 or so collecting hundreds of little grey slugs in a bucket that I filled with water in an attempt to drown them…they just crawled out. Many people use slug bait in liquid or pellet form which works but I don’t like to have my pets around that, so I use Sluggo which is iron phosphate and not poisonous to anything but slugs. It takes a week or so to see its affects. I don’t use Sluggo in my pots however because it can create a mineral buildup that may be harmful to the occupants. In pots, sprinkle diatomaceous earth around the plants. You can get both of these products at the hardware or greenhouse store. I also have a pair of slug snipping scissors…snipped slugs make great compost.

Deer: Deer can also eat every single green thing in your garden, like a moose but not as quickly, since they are much smaller. The same solutions mentioned in the moose paragraph apply on a lesser scale. Deer are visual so any type of barrier works such as a big board fence. They are pretty competent jumpers so the fence needs to be fairly tall. Electric fences are also effective but deer are amazingly aware of if and when it is or isn’t working. I had hoped my dog would be a good deterrent but deer who are accustomed to living in a suburban setting don’t tend to be afraid of dogs. I have heard that deer don’t like human hair, I can’t prove this but I do sprinkle the clippings around after I cut my family’s hair.

Little critters: I have trouble in the spring when bigger seeds, such as peas, beans, corn and/or sunflowers begin to germinate. Something digs them up, eats the seed and leaves the stem and root. Very annoying! Sprinkling chili pepper flakes (I get the big jug at Costco) over the dirt after the seeds are planted works pretty well. This year I am also trying plug in ultrasonic pest repellers to see if that helps in the greenhouse and near the house.

Aphids: These lovely little bugs can accumulate thick and solid before you know it on dahlias, nasturtiums, dill, maple and fruit trees to name a few. They are either green or black ovals and are often accompanied by ants that collect the “milk” or nectar the aphids produce while sucking the plant dry. Two things work. I set my hose on the hardest spray and blast the aphids off the plant. This only works for fairly hardy plants. For the more tender vegetation I spray a weak mix of soap and water from a standard spray bottle. I have also smashed many with my fingers which is kind of messy but very satisfying…I wear gloves.

Bugs that like broccoli, onions and carrots: There are flying insects that lay their eggs, in or around plants. When the eggs hatch, the larvae feast on and ruin in various ways (that might be another story for another time that I am not really willing to write because it’s too disgusting) the above mentioned plants. They are known by various names like cut worm, bud worm and root maggot. A simple way to deal with these pests is to place a row cover (very light weight cover you can get at the hardware store) over the plants or seeds when they are placed in the ground. Weigh the edges down with rocks, loosely so there is room for the plants to grow. This will prevent the flying adult insect from getting anywhere near plants to lay their eggs.

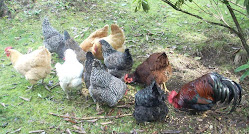
Cats and Chickens: Although you may not think that these two are related…what they can do in your flower bed, or any exposed dirt is very similar – I won’t go into any details, and as beneficial as it is to have them as pets, you don’t want them digging in your garden. Even though they can both jump I find that they don’t tend to, so I have constructed various short barriers (see sidebar) around any exposed dirt to keep them out. Also, they really prefer their dirt dry so keeping things watered helps.

Moles: Moles eat earthworms primarily and earthworms eat compost. I have a mole problem where I put compost. Moles don’t care about plants but in their digging quest for worms they uproot them. I have tried everything I can think of and have heard of to chase moles away from the garden, like car exhaust down the hole, various types of traps in the hole, stomping on the tunnels, rat poison in the holes, smoke bombs, screaming and yelling. I have not solved the problem so if you have any ideas let me know!

There are other pests I know about such as lawn mower or weed eater blight (as Colette calls it), dogs, kids, basketballs, bikes, weather, etc., but you are on your own with those. Otherwise I am always looking for pest solutions. It would be so cool, if you have any pesky pest tips -- that work -- to add them into the comments here so that we can all learn new ways to accommodate the pests who insist on pestering us – in the garden!

Sunday, March 8, 2009

Compost - The Ultimate Recycle

When I was growing up composting was just something we did. Every kitchen scrap was put in the green bowl by the sink and then later buried between the rows in the garden. Each fall, after the big storms, we went to the beach and hauled, what seemed like tons of the seaweed that had washed up, home to the compost pile. In the spring we added what we called “barn scrapings” after considerable effort shoveling. Imagine my surprise when at some point I realized that not everyone composted. It still seems odd to dump food scraps into the trash when I am not home. As an adult, composting is still the way in my life. It is the ultimate recycle and you should all be doing it in some form or another. It is an inexpensive source of nutrients and keeps the energy in your own gardening system not the landfill!

There are many ways to compost and once again I recommend research (friends, online, seed catalogs) and experimenting to find what will work best for you. There are two kinds of composting hot (which kills lots of seeds and things but the temperature can be hard to maintain) and warm. I prefer warm because it takes the least effort on my part and encourages worms to hang out – worms make the very best fertilizer (worm castings) there is!

This is what I know about composting...

It is important to find the right kind of container that will meet your needs. As you research you will find many types of composters. What you use will depend on what kind of space and resources you have. If the yard is small and/or completely landscaped, the commercial varieties work well since they don’t take up much space and are nice looking. My mom now uses one because her neighborhood has grown since I was young and she has to have a more secure situation to keep the dogs and black bears out. Some of these pictures are of the setups I have around my yard which is not small or highly landscaped. The others are from Mom's yard. They all work. Another consideration will be size and that is something to figure out as you compost. The key is to be flexible since your composting adventure may change, depending on who is eating at your house, how much energy you put in to pulling weeds and/or mowing, or changes in the season.


Next, what should you put in it? Kitchen scraps are great. Unlike my mother who used to have the luxury of putting everything into her compost because nothing bothered it, I sort. I have two buckets in the kitchen, one for the chickens and one for the compost pile. Just as a side, chickens will eat anything you could eat (not that you would) such as apple, carrot and pear peals, moldy bread, left over pasta and rice, etc. If you don’t have chickens, it can all go to the compost. The only thing I don’t include is meat and cheese. I don’t want to encourage critters like raccoons…and the dog prefers it in his bowl anyway. Very little food goes into the trash or down the disposal.

Yard waste makes excellent compost fodder. A mix of green and brown is the optimum…Green being grass clippings and weeds. Grass is great in the compost but too much can slow decomposition and may get sour and stink. In any type of gardening there seems to be plenty of weeds. I put them all in the compost, but try to harvest before they have mature seeds. That doesn’t always happen so I put seeds into another pile to use in later years. Mix in brown which would be leaves (my mother-in-law calls leaves “gold” as far as an ingredient in her compost pile) and plant stalks cleaned out of the garden. I stockpile leaves in the fall to be added throughout the year (another pile). Don’t include sticks and twigs unless they are chipped, because it takes too long for them to break down.

Maintaining the compost pile is simple. The one and only thing absolutely required is adequate water. If it hasn’t rained in a while, a good soaking with the hose is helpful. Stirring occasionally will speed up the decomposition process. Then just sit back and let the worms and their friends (bacteria, fungus, microbes, bugs) do the work. Some may be concerned about the smell but if your set up is decomposing correctly the only odor should be a yummy dirt smell.

Now use it...compost can be used all over the yard as a top dressing or mulch around landscape plants, in the bottom of pots or I mix it into all of my raised beds before planting. The timing is important and depends on what is in the pile and how much tending it got. If most of the ingredients are still recognizable, it hasn’t been long enough. If all I see is mostly dirt with a few corn cobs, egg shells and peach pits, it’s ready. In the three-bay compost, I generally add to one, the second is decomposing and the third I distribute. One hint, as lovely as compost is, it takes a lot of nitrogen to break it down, so I mix in a little blood meal or other natural source of nitrogen as I spread it around. The only drawback is that I could always use more than I have.

So whether you just deposit your leaves and grass clippings behind the shed or compost everything possible, your yard will benefit and you are doing an easy little thing to help take care of the earth!

Monday, March 2, 2009

The Other Story -- Planting a Seed


Are you thinking about doing some gardening this year? Maybe you're considering starting with seeds in the spring? With a little careful effort, seeds are the greatest way to start a garden. This is what I know about growing seeds:

Research is everything when it comes to seeds (meaning study the back of the seed packet). You will learn about what kind of light and space the plant requires, when to plant and if you need to start it indoors or directly sow it outside. Timing is very important when planting seeds.

Some plants, such as tomatoes, peppers, eggplant, broccoli and many flowers need to be planted inside. A few simple steps will insure a healthy and sturdy plant. Although you can use whatever container and dirt you have around, investing in seed starting mix and new clean pots will increase your success significantly. Seed starting mix, rather than potting soil is important because it doesn’t have fertilizer and other elements that may inhibit germination (seeds sprouting). There are many little microbes and fungus in regular dirt that don’t bother plants but can prevent seeds from germinating and will still be in previously used pots. So if your pots have had plants in them previously, wash them thoroughly with soap and a little bleach. I like to buy new seed starting trays every year, which makes my effort more rewarding and I always find other uses for the trays throughout the growing season.

So now you have clean pots filled with seed starting mix. Moisten the mix thoroughly (wet as a full sponge but not dripping) and then bury seeds the depth suggested on the seed package, generally 3 times the size of the seed. Cover with a plastic cover or plastic wrap to prevent drying and then find a warm spot to promote germination. My mom puts her trays on top of the refrigerator and I have them on the warm floor in the laundry room. Check regularly to see if they have begun to grow. This can happen in one day or a week depending on the type of plant.

As soon as you see a hint of green, get your plants into the light. The best is under a grow light and in a sunny window. At this point the hardest thing is preventing your plants from getting leggy (tall spindly stems) which is a symptom of not enough light. I use a plain old shop light that I “borrow” from the garage (my husband tries to be understanding when it is darker in the garage than normal in the spring). You can buy full spectrum bulbs for your shop light which would be perfect, but they are expensive, so I just use whatever florescent bulb is already in them. The trick is to keep the light 2 or 3 inches above the plants at all times, so make the light situation adjustable either by moving the light or plant trays up and down. A bonus is keeping your growing setup in the window to enjoy natural light as well. If you use just the window, plants will tend to lean toward it and get leggy. Finally, keep everything watered (a little water soluble fertilizer after you see the second set of leaves wouldn’t hurt) and enjoy watching your babies grow.

Eventually, when it is warmer outside, I give back the shop lights and put my plants out. Plant in the garden per the directions on the seed package, but before that your plants will enjoy sitting in the sun. Getting them used to the elements must be done gradually and is called hardening off. The first day, leave them out 15 minutes to ½ hour. Each day after that double the time until by the end of the week they can be out all day. Be sure to bring the plants in at night if it’s going to be cold.

During or at the end of the process described above you will need to transplant your plants into a bigger pot or the garden. Here are a few things I do to make it an easier transition reducing shock that might set back or kill plants. Most plants can handle transplanting if done carefully. Extra care should be taken with cucumbers and squash type plants as they are very sensitive to having their roots disturbed. Dig a big enough hole that the plant will easily fit into, stir in some fertilizer granules (I use rabbit pellets) and fill with water that has some water soluble fertilizer mixed in. Carefully remove the plant from the pot by squeezing the sides, banging it gently against your hand and/or pulling gently on the base of the plant. If it is root bound (roots so dense they stay in the pot shape and are growing out the water drain holes) loosen or pull the roots apart some or they will continue to grow in that shape which can stunt the plant. Place the plant in the hole, burying it no deeper than it was previously (except tomatoes can be buried much deeper-see tomato article below), fill the hole with dirt and then water well which packs the dirt around the roots.

Once your seeds/plants are in the garden or permanent pots, keep them watered, add a little water soluble fertilizer occasionally and enjoy yummy vegetables throughout the summer. Remember, this is the way I do it, but there are many ways and experimentation is always good.

A Pot Full of Tomatos

Everyone is asking me about gardening and with the current economic situation in our world it is a good question! “Gardening” is easy and can be an inexpensive way to relieve some of the pressure on your food budget. “Gardening” is a very broad term that applies to anything from just one pot to acres of plants. Everyone should have at least one pot worth of gardening and it is my goal that all of you have at least one pot full of tomatoes on your patio or deck this summer! Here is how:

First you will need a pot. Tomatoes like some space (generally 3-5 gallons per plant) and any container will do, as long as it has holes in the bottom so water can drain…I have drilled holes into everything! Ideas for containers might be; 5 gallon bucket, drink bucket, mop bucket – any kind of bucket, greenhouse pots, or anything fancy you might already have for flowers, etc.

Along with the pot you’ll need a tray under the container to catch the water. This gives some reserve for later and keeps the nutrients in the potting system rather than on your patio. A tray can be anything as well, even another bucket, as long as it holds water.

Then you will need to invest in some potting soil and fertilizer. Potting soil comes with some fertilizer but additional is needed because tomatoes like plenty of “food”. I use rabbit pellets, but any general type of solid fertilizer granules is adequate. A water soluble fertilizer such as Miracle Grow is beneficial when planting and throughout the season. These fertilizers can be used on everything in your garden.

Next you need a tomato. There are many kinds of tomatoes and they will all do well in your bucket, but a little research (reading the tags at the greenhouse store or asking the vendor at the farmers market) will give a plant more suited to your container and space. This is what I know from my own experience: “Patio” tomatoes are great because the plant is small but production may be less. They are perfect for a small container and space. Cherry tomatoes have amazing taste and produce like crazy but the plants are tall so plan accordingly. Giant tomatoes such as beefsteak can be a bit unwieldy in a pot and may not be as productive, but should be included if you are doing several different pots and have the space. My favorites are the medium varieties like Roma, Early Girl and heirlooms. You might want to plant seeds but that is a different story for another time.

So now you have a tomato plant and a container ready with dirt, you are ready to plant. Tomato plants are unique in that they can grow roots on their stem if buried. So dig a big hole in your pot and mix a smallish handful of fertilizer granules in the hole. Trim off the first several rows of branches from the bottom of the plant, leaving 2 or 3 sets at the top. Being careful not to break the stem, angle or lay the plant on its side and bury up to the first set of remaining leaves. Covering the stem this way not only encourages more root growth but creates a much stronger stock. If it’s a little crooked because of the planting angle, it will straighten itself out in the next few days. Water it well with a little water soluble fertilizer.

Once your tomato is planted and watered you need to find a warm sunny spot on your patio or deck where it can spend the summer. Regular watering (try not to let it completely dry out) is all that is required but some water soluble fertilizer from time to time will keep your plant happy. You can do a little pruning of the extra shoots throughout the summer so your plant isn’t wasting it resources on too many stems and leaves rather than fruit. Anything can be pruned – well, it does need a few leaves to photosynthesize which is the process plants use to get energy from the sun – leave all the stems that hold flowers and then fruit. In the late summer you can snip off any new flowers so that the plant uses its last energy before winter ripening the remaining tomatoes. Once the fruit begins to form most tomato plants need some type of support like a tomato cage or stakes.

With this small effort you should have months worth of yummy tomatoes. If there are some green ones left at the end of the season, place them in a sunny window and they’ll ripen. I hang my plants with green fruit still attached upside down in the garage or greenhouse before the first frost and have tomatoes getting ripe until thanksgiving.

As an addition to your pot full of tomatoes, consider adding other vegetables or flowers like nasturtiums or little gem marigolds (which are also edible) for a full beautiful arrangement. Peppers, cucumbers, eggplants, herbs also do well in containers.